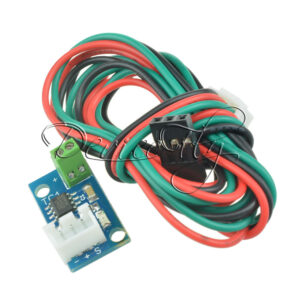
Extruder orbiter v2.0 med LDO Stepper Motor, kabel har hvit JST connector for SKR og andre + hvit adapter variant, + medfølger løs svart dupont kontakt for einsy rambo kort.
LDO Orbiter extruder v2.0
For 3D Printer, For Voron 2.4, For Creality 3D CR-10S, For Creality 3D Ender 3, For Creality 3D Ender 3 pro, For Creality 3D CR-10 CR10S PRO/Ender3/5 PRO/Tornado
Features (fra BIQU sin variant, Trianglelab sin variant lenger nede på siden)
1.Shorter drive gears 11mm vs 15mm
2.Hardened filament drive gears
3.Weight reduced to ~135 grams
4.Smaller more compact dimensions (11.6% shorter)
5.New motor design offers ~40% increase in pushing force in real printing conditions and much improved
acceleration performance
6.Flipped drive gears – filament path closer to the extruder center for a more balanced design and perfect
fit on delta printers as well
7.Stainless steel filament exit guide with 0.2-0.3mm clearance to drive gears for best TPU printing
experience and extreme wear resistance when using abrasive filaments.
8.High temperature resistant injected housings, GPA12
9.Machined PEEK secondary drive gear sleeve
10.Tension mechanism with grab screw design (Captive Grab Screw)
11.Mounting screws in line with filament exit path – improving housing stiffness and easier mounting
12.Perfectly aligned filament path
13.New smaller and better PTFE input coupler
14.Motor position rotated by additional 10 degrees for easier maintenance and assembly
15.Filament sensor add on with auto load and unload button add on feature
16.And many more small changes to improve mechanical accuracy and design look
Basic Configuration:
• Steps: 690 steps/mm @ 16 micro-stepping
• Max. instantaneous speed change (jerk): 600mm/min(RRF), 10mm/s
(Marlin) (recommended 300/5)
• Pressure advance: 0.02~0.03s – to be calibrated
• Retraction: 1~1.5mm – to be calibrated
• Retraction speed: 120mm/s
• Motor current: 1.2A Peak or 0.85A RMS (LDO-36STH20-1004AHG)
• Acceleration: 10000 mm/s2 *
• Normal motor operating temperature: 60-75°C
* The extruder itself without filament can handle acceleration up to
25000mm/s2. Adding weight of the filament it drags along its
recommended to have acceleration limit set not above 10000mm/s2
EXTRUSION PERFORMANCE:
Optimized the motor
design to maximize its
torque in the speed range
the extruder needs it.
The result is ~40% increase
of the pushing force in real
printing conditions.
Retraction speed up to
120mm/s
Acceleration up to
3000mm/s2
Info fra Trianglelab sin LDO Orbiter v2.0 her:
=========================================


design to maximize its
torque in the speed range
the extruder needs it.
of the pushing force in real
printing conditions.
120mm/s
3000mm/s2

Videre info fra ZARIBO OM Orbiter 2.0:
Orbiter v2.0 firmware configuration
Basic Configuration:
- Steps: 690 steps/mm @ 16 micro-stepping
- Max. instantaneous speed change (jerk): 600mm/min(RRF), 10mm/s(Marlin) (recommended 300/5)
- Pressure advance: 0.02~0.03s – to be calibrated
- Retraction: 1~1.5mm – to be calibrated
- Retraction speed: 120mm/s
- Motor current: 1.2A Peak or 0.85A RMS (LDO-36STH20-1004AHG)
- Acceleration: 10000 mm/s2 *
- Normalmotoroperatingtemperature:60-75°C* The extruder itself without filament can handle acceleration up to 25000mm/s2. Adding the weight of the filament it drags along it’s recommended to have acceleration limit set not above 10000mm/s2.Reprap Firmware Configuration:
M350 E16 I1
M92 E690
M203 E7200
M566 E300
M201 E10000
M906 E1200 I10 M572 D0 S0.02
M207 S1.5 F7200 Z0.2
Klipper Configuration:
[extruder]
microsteps: 16 full_steps_per_rotation: 200 rotation_distance: 4.637 nozzle_diameter: 0.400 filament_diameter: 1.750 max_extrude_only_distance: 500 max_extrude_only_velocity: 120
;micro stepping set to 16 with interpolation ;steps/mm – you may need to finetune it
;max speed mm/min
;instantaneous speed change mm/min
;acceleration mm/s2
;motor current 1.2A idle current 10%
;pressure advance – to be calibrated ;firmware retraction
#set your nozzle diameter
pressure_advance: 0.025 pressure_advance_smooth_time: 0.03 [tmc2208 extruder]
interpolate: true
run_current: 0.85 #**
hold_current: 0.100
sense_resistor: 0.11 #** stealthchop_threshold: 0
driver_TBL: 0
driver_HEND: 6
driver_HSTRT: 7
driver_TOFF: 4
#to be calibrated #to be calibrated
**Very important note!!! Please make sure the sense resistor is set according to what yuu have on board. TMC2208 and
TMS2209 usually have 0.11 ohm, TMC2660 have 0.051 Ohm and TMC5160 have usually 0.075 ohm.
As an example if you set by mistake the sense resistor to 0.11 instead of 0.051 the real current of the motor will be more than double, and the power injected in the motor more than four time higher, yes you read it correctly FOUR – AKA 4 times higher. 0.85A shall give a power loss of about 3W doubling the current will lead to 12W – this will melt all the plastic gearset before you notice something is wrong.
How you can identify the sense resistor? It’s pretty easy, look for two identical resistors which are bigger than all the others on board or around the stepper driver. See the examples in the next pictures.
Marlin Configuration:
• First send configuration commands and save them to EEPROM.
- Second, edit the marlin configuration files edit Configuration.h and Configuration_adv.h recompile and reflash your microcontroller firmware.
- Send the following commands via USB:
M350 E16
M92 E690
M201 E10000
M203 E120
M205 E5
M906 T0 E850
M900 T0 K0.22 L0.04 M207 S1.5 F7200 Z0.2 M500
;micro stepping set to 16
;steps/mm – you may need to finetune it
;acceleration mm/s2 ;max speed mm/s
;E jerk mm/s
;TMC motor RMS current in mA
;linear advance values to be calibrated
;firmware retraction ;save settings to EEPROM
Motor current configuration using reference voltage
- Adjust Vref by the trimmer resistor to a voltage corresponding to 1.2A Peak. Current. You will need to use a digital multimeter.
- For most drivers the shunt is 0.1Ω, adjust the voltage at the trimmer middle pin to 1.2V.
- Be aware some drivers have different shunt configurations and you have to set different voltages please check your driver documentation.
- Setting to high a current will overheat the stepper and potentially damage the extruder!
- – Settings for **TMC2209** – Vref =1.2V
Warning: Please check if your driver has a trimmer or not. If yes, most probably firmware configurations of the motor current have no effect. Some TMC drivers even if they have onboard trimmer but the motor current can be set via UART as well like the TMC2208.


